

How To Make Chocolate Covered Oreos Without A Mold
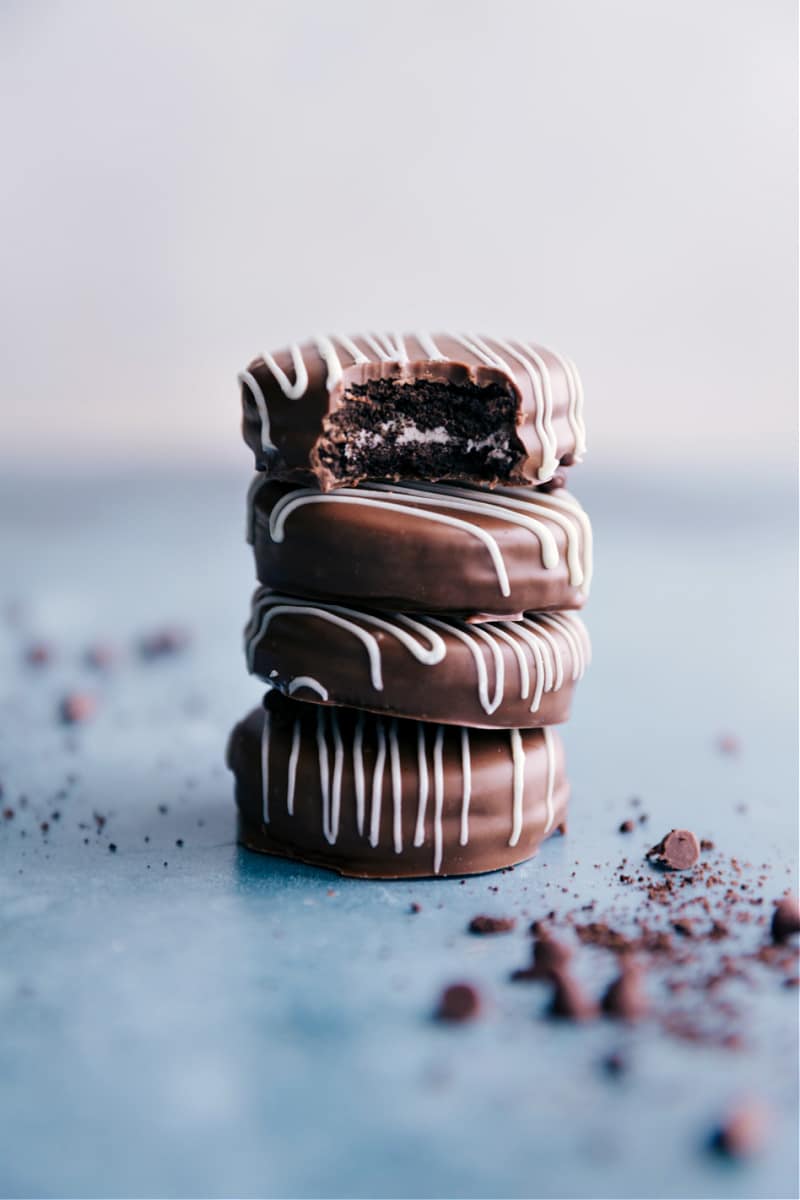
These Chocolate–Covered Oreos® await so fancy, but couldn't be easier to make! These treats are rich and chocolatey with a creamy centre. Decorate the Oreos with colorful sprinkles, crushed peppermint, additional chocolate, or leftover cookie crumbs.
These Chocolate-Covered Oreos make a great dessert, snack, or party favor. I dearest to gift them effectually the holidays along with homemade Honeycomb Processed, Peppermint Bark, or Toffee.
Chocolate-Covered Oreos
How do you brand America'due south favorite cookie fifty-fifty improve? Dip it in chocolate of course! The possibilities are near endless with this recipe; you lot can dress these upwards for just near any issue or holiday. They're great with different chocolates and various flavors of Oreos.
Beyond the practically countless amounts of decorating ideas, chocolate-covered Oreos are too easy to make. No need for special molds– if you've got a fork and a basin, you'll be on your way to Oreo sky in no fourth dimension at all.

Decorating And Topping Ideas
- Salty-sweet: Add a sprinkle of Maldon Sea Common salt flakes.
- Topped with more than sweets: Add together Oreo cookie crumbs, your favorite sprinkles, or crushed peppermint on pinnacle.
- Dress 'em up for the holidays: Dip the Oreos in chocolate then employ vacation-colored candy melts or holiday-inspired sprinkles to jazz up the cookies. Or brand themed holiday Oreo pops (similar these Christmas Oreo Pops, Halloween Oreo Pops, and more Halloween Oreo Pops).
- Make chocolate-covered Oreos on a stick. For a fun care for, add the Oreo to a lollipop stick first to make an Oreo Pop. Gently separate the Oreos and press the stick into the middle of the cream in the center of the cookie. For actress secure concur, dip the lollipop stick first in melted chocolate and and then press it into the center of the cream. Press the cookie back together gently and permit harden. Dip in chocolate, allowing backlog chocolate to drip off, and then identify on parchment paper or in a cake popular stand up to finish hardening.

QUICK TIP
Gift chocolate-covered Oreos! Once the chocolate coating the Oreos is hardened, catch a few and place them in a modest gift pocketbook or box tied with a festive ribbon. This makes a great holiday gift for friends, teachers, coworkers, neighbors, etc.
How To Add Sprinkles To Chocolate Covered Oreos
Add sprinkles (or any not-chocolate topping) to the Oreos immediately afterwards dipping them. The chocolate needs to still exist moisture then the sprinkles or toppings will stick as they dry. I add sprinkles immediately after transferring the dipped Oreo to the parchment-paper-lined tray.
To avoid spilled sprinkles all over, make certain to use a tray with sides.

Chocolate Covered Oreos Ingredients
- Oreos. Use original, double-stuffed, golden, or whatever other variety you like or would similar to try. Here'south a list to browse all the different Oreo varieties.
- Melting wafers or high-quality baking bars. Chocolate chips/baking morsels have stabilizers that keep them from melting completely smooth (which is good when y'all desire them to stay in a chip shape for cookies, but non so much when yous desire a pretty blanket on Oreos). We recommend chocolate made for melting like good quality baking confined (such equally Bakery's, Lindt, or Ghiradelli) or good quality melting wafers (such as Ghiradelli) for all-time results. (Both bars and melts are found in the blistering aisle of the store.)
- Oil. A little coconut or vegetable oil helps thin the chocolate to make dipping easier and for the chocolate to get on smoother.
How To Make Chocolate Covered Oreos
- Managing the temperature of the chocolate: Once virtually of the chocolate in the bowl is melted, add in some unmelted chocolate. The heat from the melted chocolate will then melt this added chocolate while also lowering the heat of the chocolate altogether. Why is this important? Information technology helps to ensure the chocolate is stabilized–and information technology also gives it a polish and glossy finish. (For more info, check out the "quick tip" below.)
- Microwave the chocolate in sturdy, heat-safebowls instead of using plastic or melamine.
- To avoid scorched chocolate, microwave for 15 seconds at a time, and stir for at least 15 seconds betwixt each microwave burst. Remember, the chocolate is still melting from residual heat even after it has been removed from the microwave. To avoid streaky Chocolate-Coated Oreos, it'due south important the chocolate never gets too hot!
QUICK TIP
Melting the chocolate slowly while stirring often promotes the germination of the well-nigh desirable type of crystals. Information technology ensures that the chocolate cools and hardens before the cocoa butter (the natural white fat) tin ascent to the surface and make the cookies wait streaky. Adding unmelted chocolate to the bowl near the cease of mixing non simply cools downwardly the overall chocolate temperature, but "seeds the batch" which encourages the chocolate to set with the right crystals which makes information technology polish and hard at room temperature.

Variation Ideas
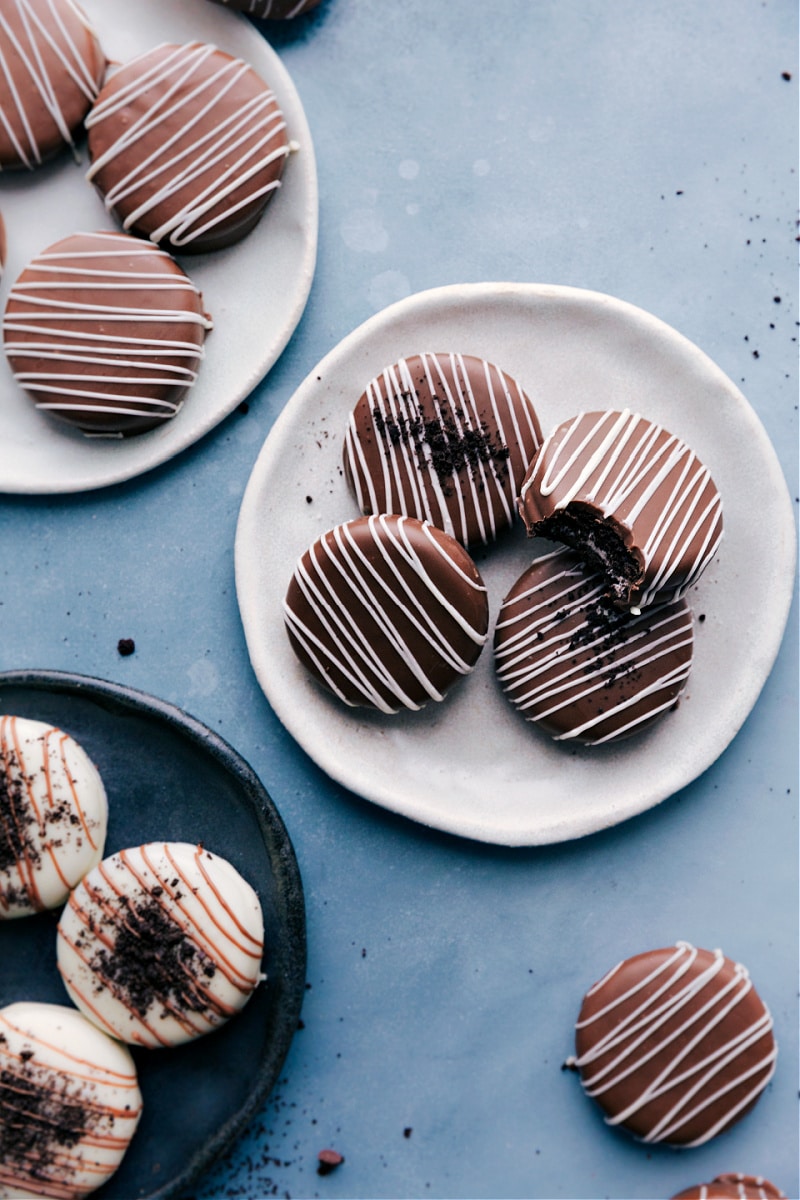
- White Chocolate Covered Oreos. Nosotros love the dissimilarity of white chocolate with the dark cocoa cookie! If yous love the philharmonic of two types of chocolate, add a white chocolate drizzle on top of milk, dark, or semi-sweet chocolate-dipped Oreo. To drizzle, add melted white chocolate to a pocket-sized plastic bag and cut off the tip; drizzle over the cookie.
- For a more singled-out, raised drizzle: Add the white chocolate afterward the milk/semi-sugariness chocolate has hardened.
- For a drizzle that "melts" into the cookie: Add together the white chocolate right afterwards dipping the Oreo in the milk/semi-sugariness chocolate.
- Dip or drizzle with melted peanut butter chips.

Chocolate Covered Oreos FAQs
1 How do y'all mold Chocolate-Covered Oreos?
If you have an Oreo cookie mold, y'all tin can use that instead. Make full the lesser of the mold with a thin layer of melted chocolate and then tap the mold a few times on the counter to spread the chocolate in a smooth layer. Identify cookie on top and so add together another thin layer of melted chocolate on top. Again, tap to spread in a smooth layer. Let harden at room temperature and and then pop the coated Oreos out of the mold.
However, yous don't need a mold. The directions in this recipe explain how to exercise it freestyle–no special equipment required.
2 How far ahead tin can I brand Chocolate-Covered Oreos?
These are the perfect make-ahead treat! They can be made and stored for 2-iii weeks!
three Where do I shop Chocolat- Covered Oreos?
These do best stored at room temperature in an airtight container. Place coated cookies in single layers, separated by wax or parchment paper.
iv How do you lot make Chocolat- Covered Oreos without a mold?
Our recipe card details how to make these treats without whatsoever special molds or tools!
5 How do you become the chocolate polish?
Tap the dipped Oreos on the edge of the basin–this volition fifty-fifty out the chocolate and shake off the excess.
6 Should I refrigerate Chocolate-Covered Oreos?
No need to air-condition these treats; they do just fine at room temperature!
Since coconut oil is solid at room temperature, information technology helps to create a solid chocolate coating for the Oreos. It also makes the dipping process easier.
8 Can you freeze Chocolate-Covered Oreos?
You tin, merely the chocolate volition probable expect streaky or murky when the cookies defrost. This is considering the cocoa solids from the melted chocolate are rising to the top. While even so safety to eat, they don't expect as appetizing.
More Oreo Treats
- No-Bake Oreo Truffle Cookieswith a white chocolate drizzle
- Oreo Assurancewith lots of variation ideas
- Icebox Cake with Oreos
- Oreo Popcornwith white chocolate
- Oreo Fudgewith sweetened condensed milk
- 1 pkg. (36 cookies) Oreos (any flavor you lot'd like!)
- ii (10 oz. each) container/pkg. milk, night, white, or semi-sweet chocolate melting wafers or blistering confined Note 1
- 3 teaspoons kokosnoot or vegetable oil, separated
- Optional toppings: sprinkles, crushed peppermint, additional Oreos (crushed), colored processed melts, etc.
-
PREP: Line a big sheet pan with parchment paper. Prepare bated for now. If using baking confined, coarsely chop the chocolate. Top tip for cute chocolate-covered Oreos: be patient when melting the chocolate and avoid rapid temperature changes. (Don't microwave as well long or also many times, stir chocolate A LOT as you're melting, and don't refrigerate/freeze coated cookies -- let the chocolate harden at room temperature.)
-
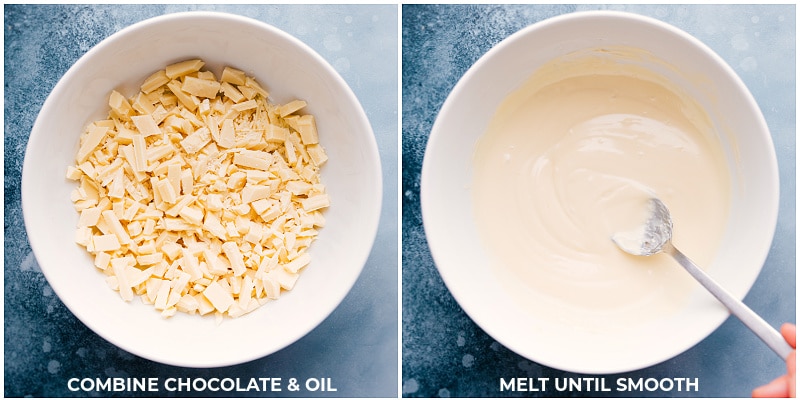
Cook CHOCOLATE: (See Note 2. ) First with one purse (or 2 confined) of chocolates at a fourth dimension. Add all EXCEPT 2 tablespoons (See Note three) of the chopped chocolate or chocolate wafers to a large microwave-safety bowl. Add together 1-one/ii teaspoons oil. Microwave for xv seconds and then stir vigorously for 15 seconds. Continue to do this until the chocolate is mostly melted. Once the chocolate is mostly melted, add together in the set aside two tablespoons of chocolate and stir until it melts. Be patient and resist the urge to microwave unless it isn't melting after stirring for 1 minute. (And so yous can microwave in bursts of five seconds at a fourth dimension.)
-
DIP: One time chocolate is fully melted and smooth, dip a fork in the chocolate and and then place one Oreo on height of the fork. Spoon melted chocolate right over the cookie. Tap the fork confronting the basin a few times to help the chocolate smooth out and get rid of excess chocolate. Slide the fork against the edge of the basin to remove any more excess. Use a table pocketknife to gently slide the cookie off the fork and onto the prepared parchment paper-lined tray. Repeat until half of the cookies are dipped in chocolate. If the melted chocolate is getting too hard to dip, put in the microwave for another fifteen seconds and remix. You may also need to swap for a new fork and new knife as the chocolate hardens or add a touch more oil. Optional -- decorate! See adjacent step. Alternatively, if not decorating practice not refrigerate, but set aside at room temperature until chocolate is business firm. Repeat step 2 & iii with the other bag of chocolate and remaining ane-i/two teaspoons oil.
-
OPTIONAL -- DECORATE: If adding sprinkles, Oreo crumbs, or crushed peppermint, sprinkle on top right after cookie is transferred to baking tray. To drizzle chocolate on top, set up aside some of the melted chocolate into a small plastic bag and cutting off the tip. Drizzle over Oreo. For a more distinct, raised drizzle: add together the drizzle later the chocolate has hardened. For a drizzle that "melts" into the cookie: add the chocolate drizzle right after the Oreo is coated in chocolate. You can likewise add sprinkles/peppermints/Oreo crumbs on top of the drizzle
-
STORAGE: Shop at room temperature in an closed container. Place coated cookies in single layers separated past wax or parchment paper for 2-three weeks.
Note ane: Chocolate: Chocolate chips/blistering morsels have stabilizers that keep them from melting completely smooth (which is good when you desire them to stay in a chip shape for cookies, simply non then much when yous want a pretty coating on Oreos). We recommend chocolate made for melting like good quality baking confined (such every bit Baker's, Lindt, or Ghiradelli) or adept quality melting wafers (such as Ghiradelli) for all-time results. (Both confined and melts are plant in the baking alley of the shop). Utilise whatever blazon of chocolate you similar -- milk, semi-sweet, night, or white (or a combination of 2 chocolates -- one for dipping and i for decorating).
Note 2: Microwaving tip: The cardinal to non scorching and ruining the chocolate is to melt in very curt bursts and to stir a lot (so much melting happens exterior of the microwave). We never want the chocolate to become hot, just warm enough to melt gradually and once it'southward smoothly melted, information technology should exist room temperature).
Note iii: Why we add more chocolate after melting: Melting the chocolate slowly while stirring oft ensures that the chocolate cools and hardens before the cocoa butter (the natural white fatty) can rise to the surface and make the bawl look streaky. Calculation unmelted chocolate to the bowl near the end of mixing not only cools down the overall chocolate temperature, but "seeds the batch" which encourages the chocolate to ready with the correct crystals which makes it smooth and hard at room temperature. Heating and cooling chocolate to stabilize it gives the chocolate a smooth, sleeky cease, ensures it won't melt easily on fingers, and allows it to set up nicely.
Serving: 1 serving | Calories: 128 kcal | Carbohydrates: one m | Protein: 0.1 g | Fat: 0.viii thousand | Fiber: 0.1 one thousand | Sugar: 0.nine 1000
Nosotros do our best to provide authentic nutritional analysis for our recipes. Our nutritional information is calculated using a 3rd-party algorithm and may vary, based on individual cooking styles, measurements, and ingredient sizes. Please use this data for comparing purposes and consult a health professional for nutrition guidance as needed.
DID You Brand THIS RECIPE?
I dearest hearing from y'all when you've made ane of my recipes! Tag me on Instagram at @ChelseasMessyApron or leave me a comment beneath.

FREE BONUS
Like shooting fish in a barrel Repast SECRETS:
How to Make Mealtime Hassle Free!
five secrets to piece of cake, fast and delicious dinners.

Source: https://www.chelseasmessyapron.com/chocolate-covered-oreos/
Posted by: hestertoeopla.blogspot.com
0 Response to "How To Make Chocolate Covered Oreos Without A Mold"
Post a Comment