

How To Make A Medieval Tent
This weeks web log is a bit different – it's supposed to be a pic tutorial every bit to how I made my Medieval tents for my Never Heed The Neb Hooks army. The thought of the tents, is that you store your army morale tokens in them during the battle. This ways that the tents have to have removable tops and I wanted something that was adequately durable. I came up with the thought of using Pringles tubes every bit the core of the tent but needed a way of making the tube wait more than tent similar! Having done a bit of research on the net, I found a plan for a full sized Medieval tent on Pinterest, consummate with dimensions. When I scaled the dimensions down to 1/48th scale ( a bit on the large size but I can handle the maths easier than working with 1/56th!), information technology turned out that Pringles tubes were ideal for the job!
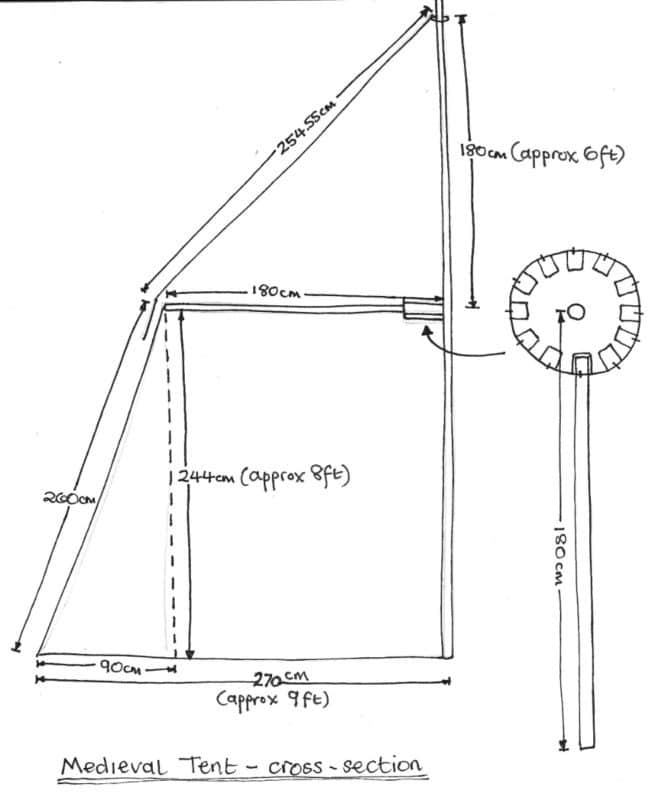
Program for Knights Tents – Dimensions are for a full sized tent.
I also found a superb youtube video showing how to make Medieval tents for Dungeons and Dragons. The video link is at the end of this commodity. I was all set to become just first I need to assemble the raw materials and tools. I jumped correct in and congenital the first tent in about an hour but wasn't entirely happy with the result, so I moved onto the 2d tent. This took a flake longer as I was more careful with the measurements and I made some improvements to the structure. If you would like to have a go at making you own tents, you will demand the following tools and materials.
Glue Gun – you tin merely use PVA but a glue gun is ideal for about of the work hither.
Cocktail sticks
Tissues ( kleenex type)
Cardboard or Foam carte du jour.
Compass or compass cutter
Sharp pocketknife
Clippers.
Ruler and pencil.
Set Square if yous desire to exist precise with your measuring ( I used the markings on my steel ruler every bit a guide.)
Stride one
Get your Pringles, whatever flavour, although I like the manifestly and the sour cream and onions, and swallow the contents.
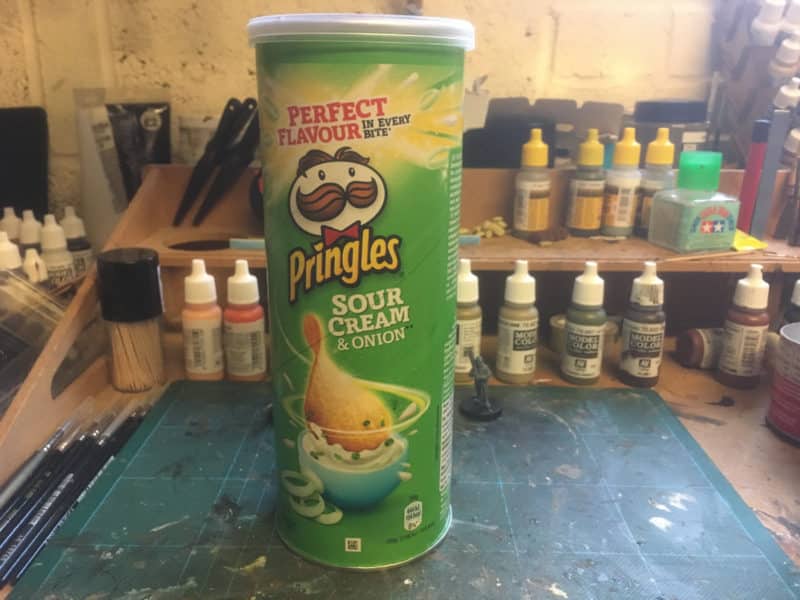
Pringles tube! First task is to empty it!
You may need some lubrication to help with the Pringles. Beer seems to work well, my current favourite is Shipyard!

You may find that you become thirsty eating Pringles!
Cut the base of the Pringles tube off ( the end with the metallic base of operations.) using a sharp knife. It'due south tricky getting a straight cutting around a tube. I used a felt tip pen blu-tacked to my work board, exactly 5cms from the side and holding the tube firmly against the edge, rotated information technology so that the pen marked a guide line effectually the tube. I then cut through the tube using my scalpel. Dont worry if yous dont go an verbal straight edge to your cut, the meridian will hide any errors.
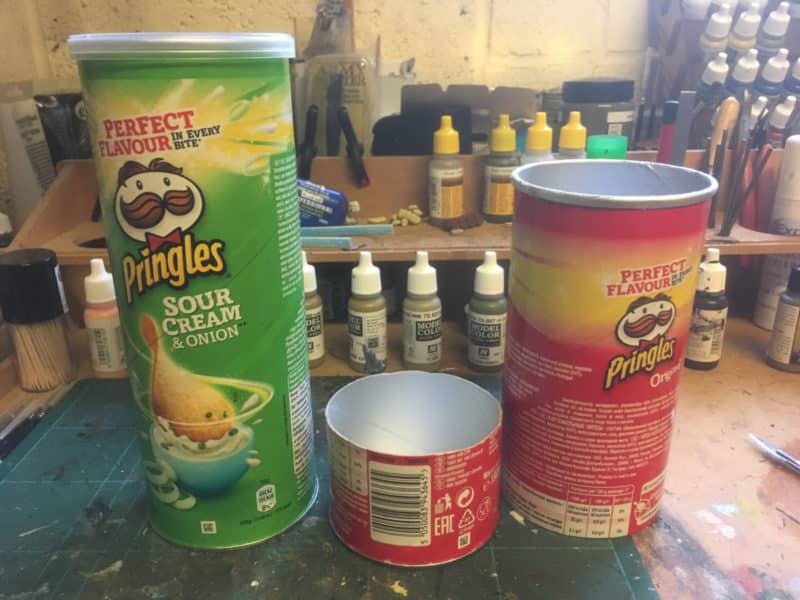
The first tube cut downwards. The height of the cut is 5cms – you tin can brand this smaller if yous prefer.
The next task is to cut out two circles. Ane at 11 cms in diameter volition be for the base of the tent – I used a compass cutter for this chore on the second tent rather than a compass and scalpel that I used for the first tent. The other circle is the same width as your pringles tube – merely draw around information technology. The tent base is fabricated from paper-thin. The top is foam card. Y'all could use cardboard for the top simply I wanted to give the elevation a flake of force.
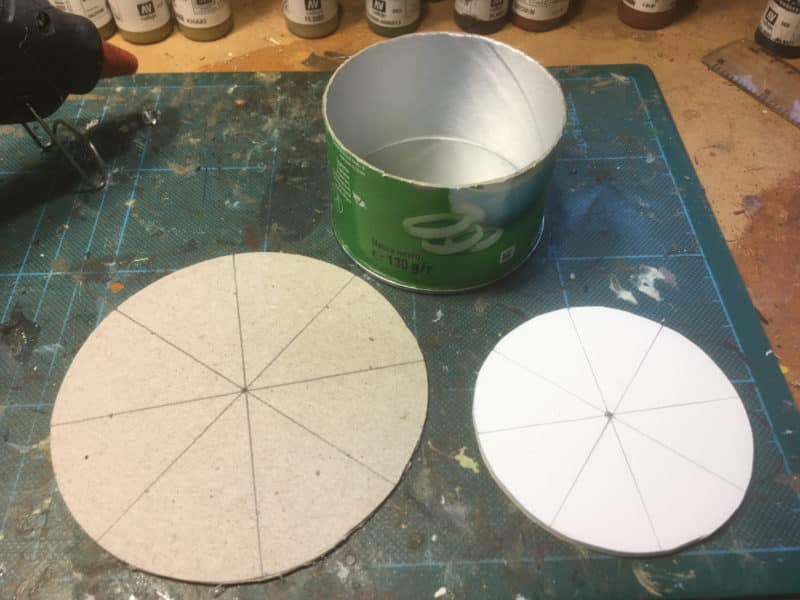
Circles cutting out – annotation that I have marked out the centre and divided them into eight segments with pencil lines.
Adjacent gum the pringles tin to the base, making sure that you have it centred as best as you can. Using the pencil marks as a guide, glue viii cocktail sticks to the base and tube equally shown below.
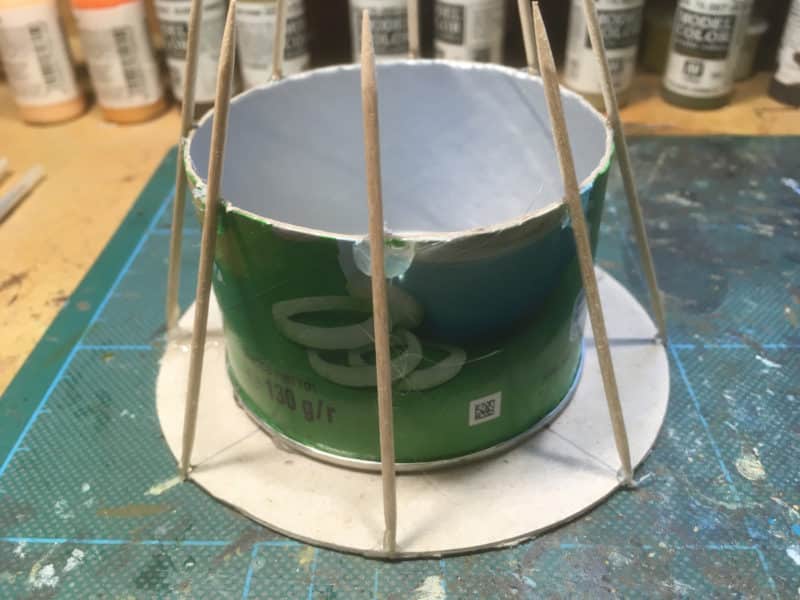
Cocktail sticks added to form the structure
I used my affluent cutters to clip off the backlog length of the cocktail stick. I then took the top disk of the tent and glued a cocktail stick through the verbal centre. You lot need to leave about 5cms of this cocktail stick equally the heart pole. Using my clippers. I then cutting eight more than cocktail sticks( at a slight bending on one end) and glued them to the centre pole at 3.75cms upward the pole and once more, used the eight pencil marks as a guide.
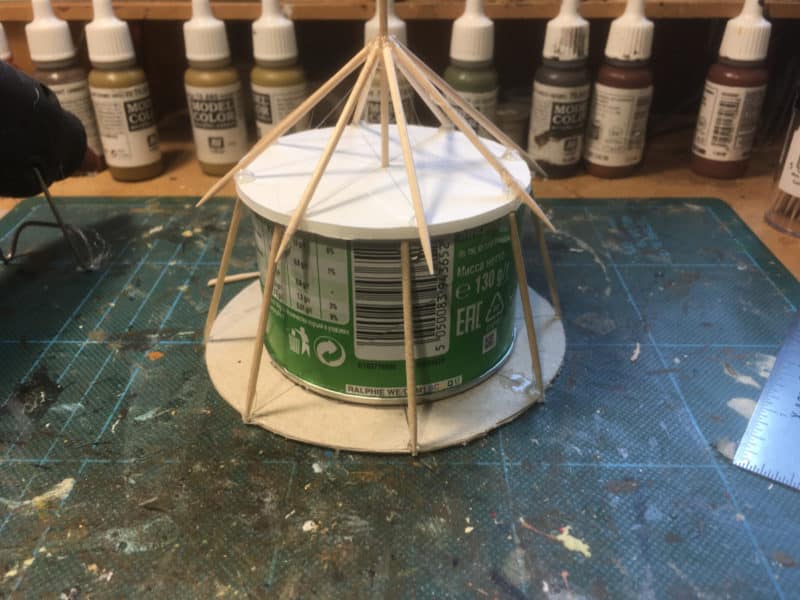
top of the tent in place – dont glue this – yous need to be able to remove it!
The next role of the process is both the trickiest and the most messy! I used standard 3 ply kleenex tissues cutting roughly to size and dipped in watered downwardly PVA to clad the base of the tent. I left i section opened and used two pieces of tissue to brand the open door.
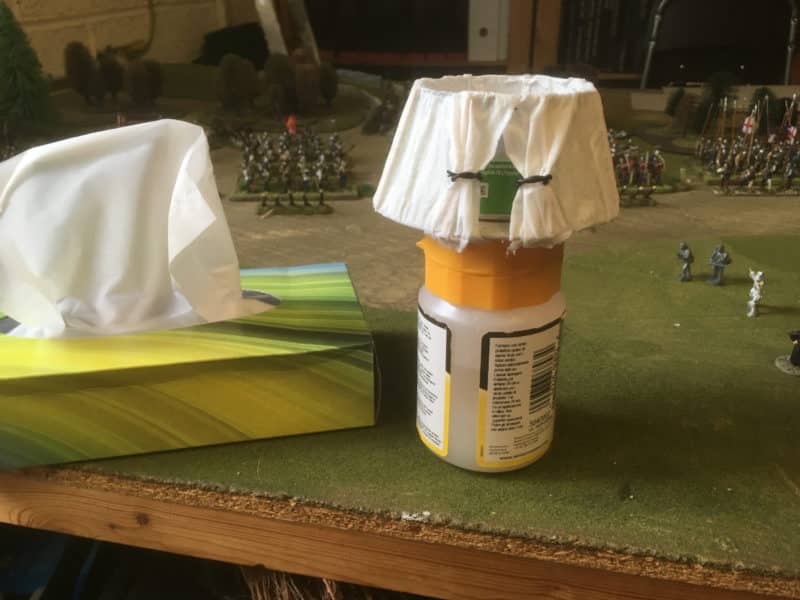
Tissue covering the main structure – complete with tie backs on the 'door'!
In that location's no doubt that this is the trickiest office of the functioning. I did observe that information technology was easier to place the tissue on the construction and using a large castor, 'paint on' the PVA. With hind sight, I think that Crepe paper or peradventure kitchen towelling would take worked meliorate as these products are stronger and less probable to rip when wet. Also, for some reason, I felt the need to explicate to my wife why I was going out to the garage with a box of tissues, pringles and my iPad….
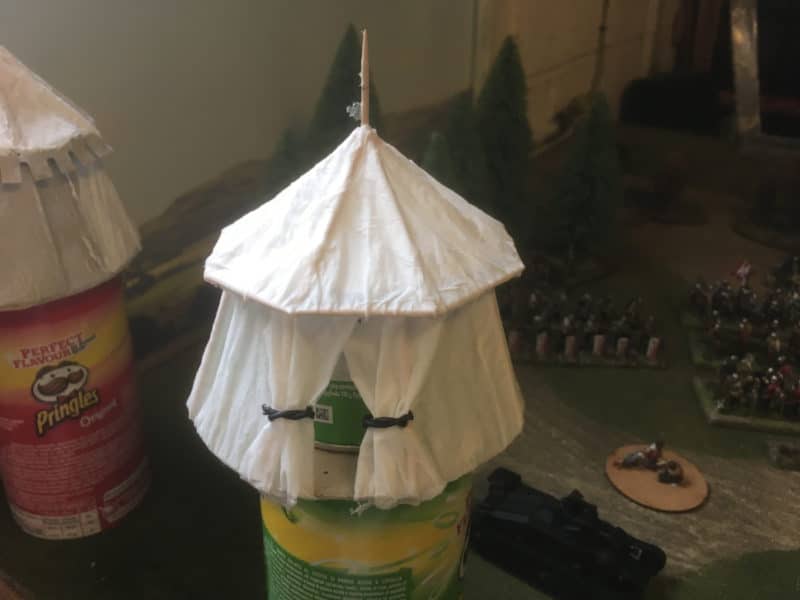
Tent with tissue added to the roof.
The whole structure was left to dry for at to the lowest degree 24hours. I and then spray primed the tents with Regular army Painter skeleton os and dry brushed them with white.
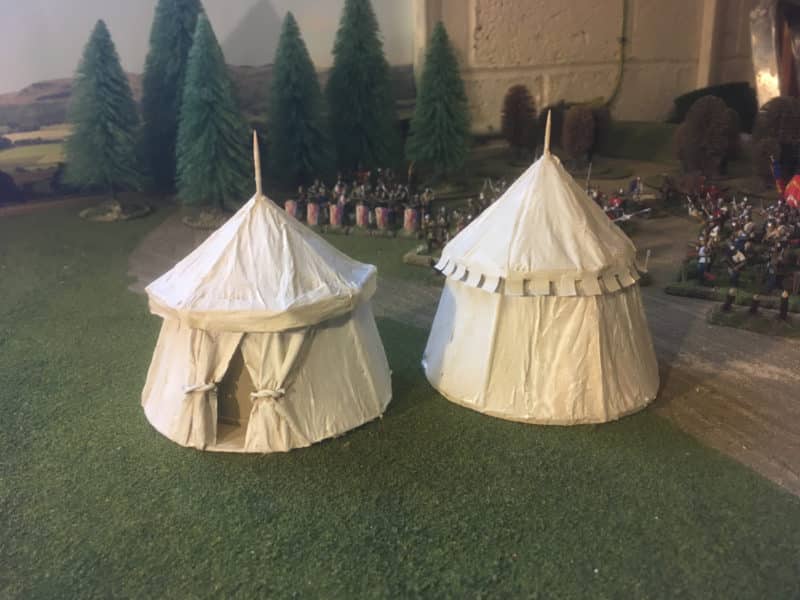
The ii tents primed and set up for painting.
The tent on the correct was my kickoff attempt. I'm non entirely happy with this one as I got into a fleck of a mess with the tissue and I've used some filler to try to hide mistakes – if you expect closely you volition see that I haven't been too successful! I merely used six 'poles' for the structure rather than viii. I've likewise added a decorative edge to the top.
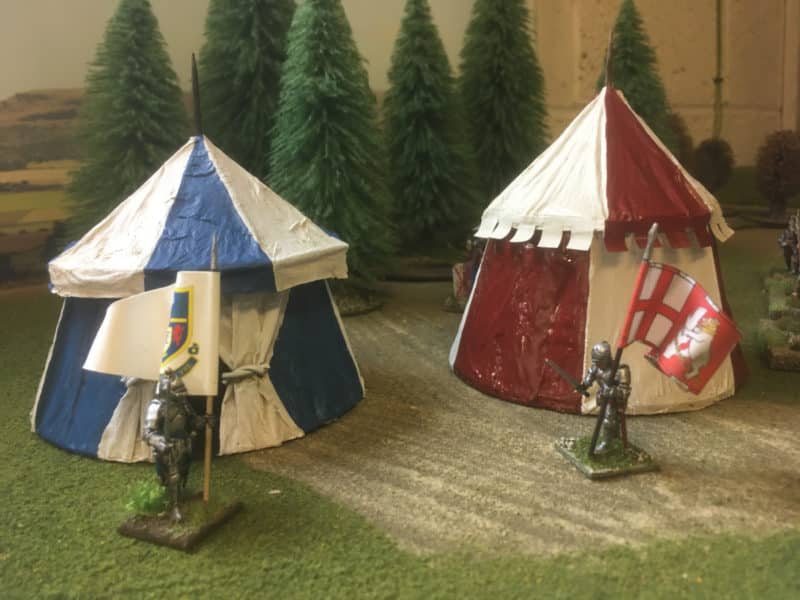
The painted tents
I and then painted alternate segments of the tents – Prussian blue for one and Burnt red ( my new favourite colour) for the other.
The tops are removable so that y'all can store your army morale tokens:
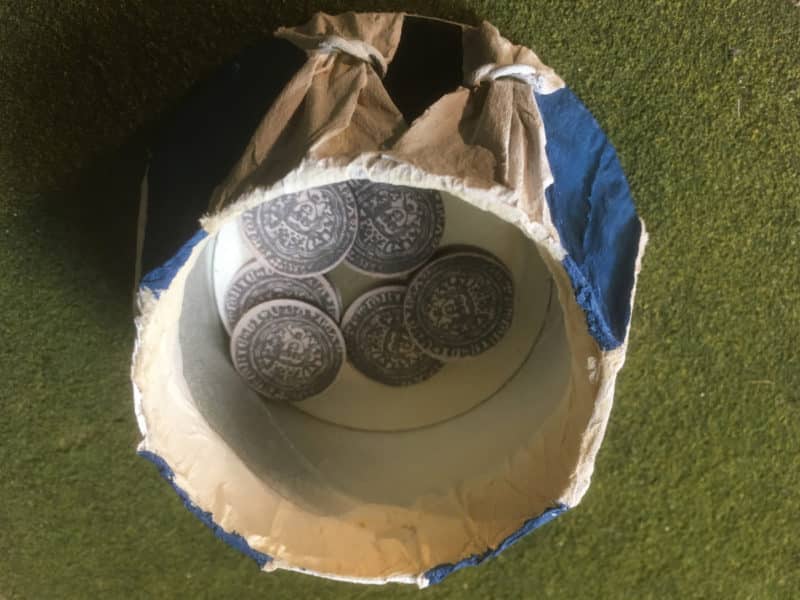
Storage section revealed! Big enough to go your mitt into pick out the tokens.
The concluding bear on was to add a bit of dry brushing to the color panels and to add some flags. Hither are the finished tents on my wargames tabular array.
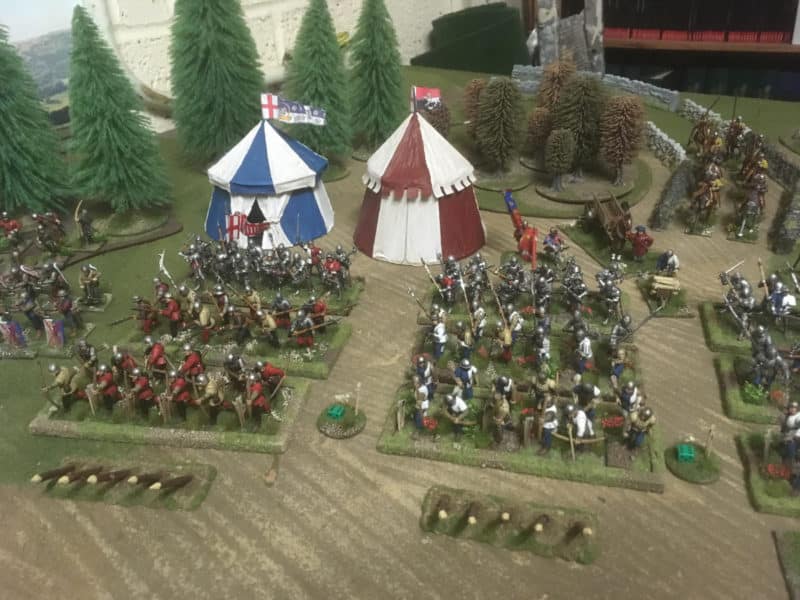
The finished tents.
I'll be honest, they exercise look better from a distance than close up. I have learnt a few lessons whilst edifice these and in the future, I may add together a few more tents to my scenery – perhaps trying crepe paper rather than tissue. But for now, they serve their purpose and function equally a place to store the army morale tokens. Talking of learning, here'south a couple of really useful videos.
The adjacent video shows where I 'borrowed' the idea of using tissue to make the tents. There are some amazing ideas hither and I volition be stealing a few more of his tips to make some unlike style tents in the futurity. The guy who makes these videos has a whole serial of fantastic terrain videos that are well worth your time if you enjoy building scenery.
I hope that you discover the to a higher place helps. as usual, hither's the commercial bit, although I dont sell Pringles, Cocktail sticks or Tissues….
THE COMMERCIAL BIT
Near all of the paints, miniatures, bases, basing materials and anything that you are likely to demand for your hobby are available Post FREE from my store hither:
Arcane SCENERY
To find PVA glue, click hither:
GLUES AND ADHESIVES
Perry'south WOTR plastic range are here, including some nice regular army deals!
PERRY MINIATURES
Yous tin run across our Woodlands scenics range, including water furnishings, here:
WOODLAND SCENICS
Gamers grass tufts can be found here:
GAMERS GRASS
Vallejo plastic filler and Milliput is available here:
FILLERS
MDF bases tin be establish hither:
MDF BASES
You tin can observe all the Vallejo Model colour paints here. If you don't want to browse, but enter the pigment number into the shop search bar;
VALLEJO PAINTS
Happy Modelling!

How To Make A Medieval Tent,
Source: https://arcanesceneryandmodels.co.uk/making-medieval-tents/
Posted by: hestertoeopla.blogspot.com
0 Response to "How To Make A Medieval Tent"
Post a Comment