

How To Make A Puzzle From A Photo
Leap to How-To
A custom photo puzzle makes a swell souvenir and it's SO easy! Use photos of kids, pets or your favorite places for this picture puzzle projection.
Skills Required: Beginner.You don't need much Mod Podging feel to make this puzzle. However, I encourage you to have patience, especially in step three. Allow for proper drying time so that you lot avoid wrinkles.
Meet Stephanie from somewhat simple. She is your host for the day with a custom photo puzzle, while I sit down on the beach drinking Mai Tais. Kidding! I only wish.
Stephanie is a fantastic blogger, but I'll allow her tell you lot about herself below. Nosotros swapped today, so come up to her weblog to meet the decoupage projection I did. Happy Fri Podgers!
Hey there Modern Podge-ers! My name is Stephanie, and I am the creative mind and creator of somewhat simple.
I am so excited to be taking over this blog today! I started blogging this past summertime – it is my niggling corner of the universe where I share craft tutorials and all things creative.
DIY Puzzle
All three of my kids have been sick this week (go ahead, experience sorry for me!). In between cuddling the sickos and disinfecting my house over and once again, I put together this fun DIY flick puzzle tutorial. It's for anyone who wants a cute, easy projection their kids can enjoy (when they aren't sick, of course!),
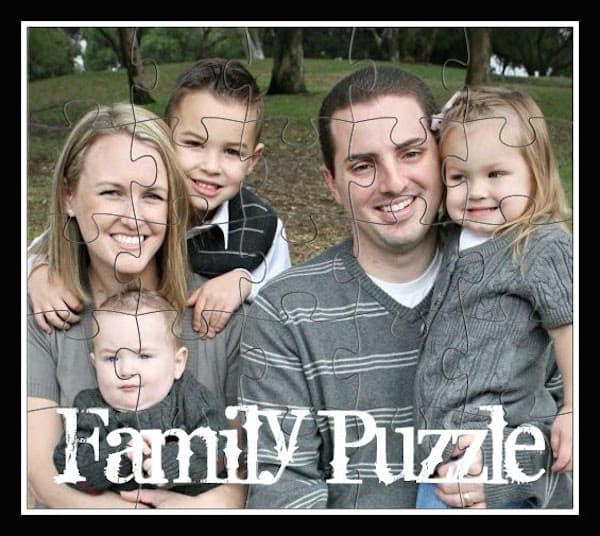
I call it "A Family unit Picture Puzzle" (so original, I know!) Each step of the tutorial has a picture, for those of you visual learners like me.
Printing Photos for Your DIY Photo Puzzle
Before you actually make your picture puzzle, you're going to need to print out the image of your option. I recommend scanning your image into your computer – you won't desire to apply original photos or photograph paper for this project.
Your best bet is to print out your image on a dry toner or laserjet printer so that there's no smearing. I've found that my HP inkjet works even though it's not a laserjet, because HP uses what seems to exist a very dry ink.
When I impress out my images, I let them dry for several hours earlier using them. Yous tin can also get to a Kinko's or somewhere with a light amplification by stimulated emission of radiation printer.
If y'all don't have access to a laserjet printer, I recommend spraying both sides of your inkjet image with a clear acrylic sealer before Mod Podging.
This will help prevent your image from smearing. If you're going to spend the time and effort to brand a custom photograph puzzle, particularly if it'south a gift, you don't desire anything to go wrong!
Once you have your image printed, yous are ready to begin. Learn how to make a puzzle beneath.
Brand a Photo Puzzle
Gather These Supplies
- Flick printed on dry out toner or laserjet newspaper
- Scissors
- X-Acto Knife
- Scrapbook Newspaper – 1 sheet
- Chipboard (ie, a cereal box) – needs to be larger than your image.
- Mod Podge Gloss
- Sponge brush
- You lot may also want a Ziploc baggie and a shipping label (those are not pictured, but I will show you what I did with them subsequently in the tutorial)
Instructions

Step i. Cut one side of your cereal box. Each box will brand ii puzzles so salve that other side!
Step 2. Also salvage your Box Top for Teaching. Send information technology to school with your kids (this isn't relevant to the tutorial, simply I had to throw it in in that location!),
Step three. Utilize your picture to the non-patterned (brown) side of the cereal box with Mod Podge. Use a medium layer of Modernistic Podge, identify the picture down, and polish thoroughly with your fingers or a brayer. If any Mod Podge squeezes out the sides, wipe it abroad with a brush.
Let dry out for xv – 20 minutes, then utilize a layer of Modernistic Podge over the top. Let dry.
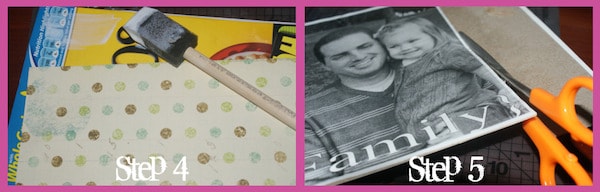
Footstep four. Turn your cardboard over and employ your scrapbook newspaper to the backside with more Modern Podge. It should be a relatively thick piece of scrapbook paper then that it covers the cereal box design.
If your scrapbook paper is sparse, y'all might want to consider painting the cereal box white earlier applying the newspaper. Whichever method you choose, allow to dry completely.
Pace 5. Cut off excess cardboard and scrapbook paper effectually the edges.
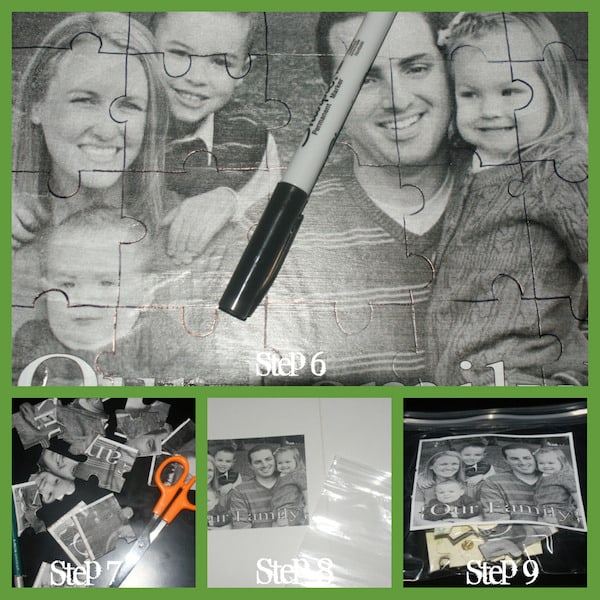
Footstep 6. Using a Sharpie or something y'all can see, trace an outline of puzzle pieces on your picture. A pencil would piece of work too.
Step seven. Cut out each piece with an Ten-Acto knife. Scissors are easier, but not equally accurate – so if you're lazy similar me, y'all'll showtime with the X-Acto pocketknife simply then end upwards using scissors. I lack patience sometimes . . .
Pace 8 (optional). Impress out a smaller sized impress of the aforementioned motion picture onto a shipping label and utilise it to the front end of a Ziploc pocketbook.
Step ix. Place all pieces into the Ziploc bag for condom storage. I accept a box of these homemade puzzles my kids love to pull out. Each puzzle is in their ain bag and it makes for a serenity game!
Variations on your DIY picture puzzle:
- Cutting the pieces bigger or smaller depending on the age of your children. For my iii twelvemonth old, I take puzzles that are only 3-iv pieces. Toddlers love to put puzzles together too.
- Instead of scrapbook paper, you tin can go along the back of the cereal box uncovered – my kids like using the cereal box as a puzzle in and of itself.
- Embrace the back with felt and utilize this puzzle on a flannel board.
Your DIY photograph puzzle is complete! Super uncomplicated, hardly worthy to be in company with the other great projects Amy has here. If yous want to run into what I tin can exercise when I am not juggling sick kids, hop on over to somewhat simple. I'd dearest to see you!
Prep Time 5 minutes
Active Time ten minutes
Dry out Time 20 minutes
Total Time 35 minutes
Difficulty Easy
Estimated Cost $0
Materials
- Flick printed on dry toner or laserjet paper
- Scrapbook Paper – 1 sail
- Chipboard (ie, a cereal box) – needs to be larger than your prototype
- Modernistic Podge Gloss
- Ziploc baggie
- Shipping characterization
Tools
- Sponge brush
- Scissors
- X-Acto Pocketknife
Instructions
- Cut ane side of your cereal box. Each box volition brand two puzzles so save that other side.
- Use your picture to the non-patterned (brown) side of the cereal box with Modern Podge. Utilise a medium layer of Modern Podge, place the pic down, and smooth thoroughly with your fingers or a brayer. If any Modern Podge squeezes out the sides, wipe it abroad with a brush.
- Permit dry out for 15 – 20 minutes, then apply a layer of Mod Podge over the top. Allow dry.
- Plow your paper-thin over and apply your scrapbook paper to the behind with more than Mod Podge. Information technology should be a relatively thick piece of scrapbook paper and so that information technology covers the cereal box pattern. If the scrapbook newspaper is sparse, you might desire to consider painting the cereal box white before applying the paper. Whichever method you lot choose, let to dry completely.
- Cut off excess cardboard and scrapbook paper around the edges.
- Using a Sharpie or something y'all can run across, trace an outline of puzzle pieces on the picture. A pencil would work likewise.
- Cut out each piece with an X-Acto knife. Scissors are easier, just non as accurate.
- Impress out a smaller sized print of the same picture onto a shipping label and utilize it to the front of a Ziploc pocketbook.
- Place all pieces into the Ziploc bag for safe storage.
Notes
I had all of the materials on manus, so this project did not cost me anything to make.
If you or your children enjoyed making this custom photo puzzle, check out these other fun activities:
- Ice Foam Stick Photo Frame
- DIY Checkers with Duck Tape
- Confetti Modern Podge Slime
- How to Make Slime

Source: https://modpodgerocksblog.com/make-a-photo-puzzle/
Posted by: hestertoeopla.blogspot.com
0 Response to "How To Make A Puzzle From A Photo"
Post a Comment